Can You Put Luxury Vinyl Planks (LVP) on Stairs? Integrated Stair Solutions for Multi-Building Projects
Yes—when specified as a glue-down stair system with matched treads, risers, and nosings, LVP can perform very well on stairs. For developers and project managers running multi-building programs, the real upside is installation efficiency, consistent finishes across properties, and predictable costs when the stair package is standardized, kitted, and labeled by flight.
Where LVP Works Best on Stairs
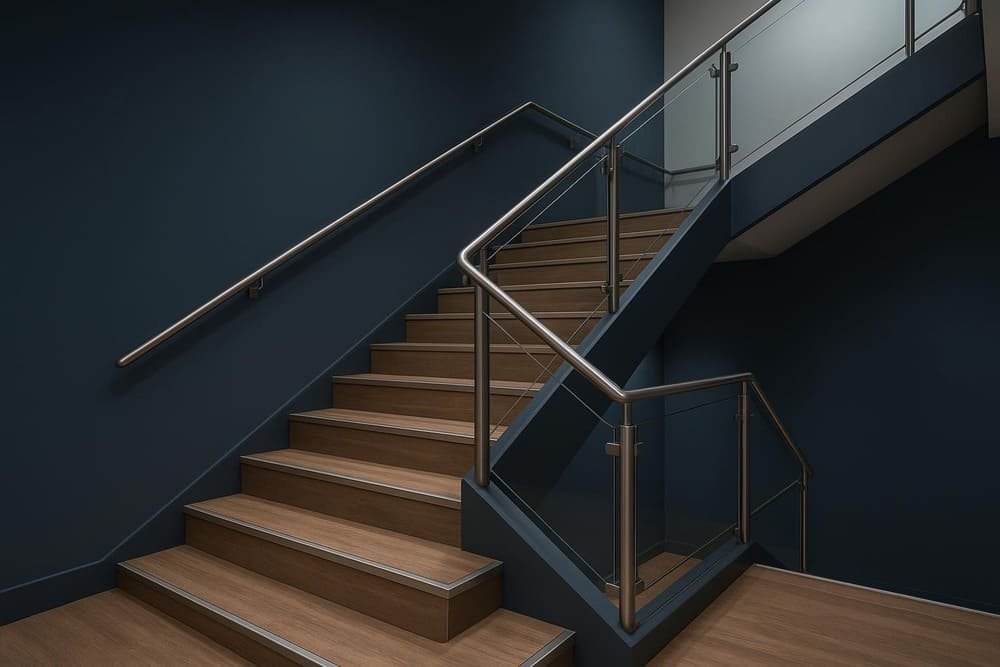
LVP stair systems are a strong choice for hotels, multifamily, and commercial amenity or in-unit stairs where resilient surfaces are preferred for durability and easy maintenance. The key constraints: use a glue-down system only, avoid floating constructions and foam underlayment on steps, and specify the right components—either factory one-piece treads with integrated nosing or a plank-wrap tread with a separate nosing, plus color-matched risers and trims. Aim for a commercial wear layer in the 20–28 mil range, a dense core for edge stability, and adhesives verified for stair applications.
Safety, Code, and Standards: Plan for Compliance
Slip resistance: Use the ANSI A326.3 DCOF laboratory test method as a comparative reference point and document it in your submittals. You can review the method in the official text via the Tile Council of North America in the 2021/2022 update under the title ANSI A326.3 DCOF test method (TCNA PDF). For context on classification updates and interpretation, see Creative Materials’ overview in 2022: Product classification under A326.3 (2022) explained, and Daltile’s concise DCOF background for specifiers. Note that DCOF is comparative and does not predict slip outcomes in the field.
Fire: In North America, confirm ASTM E84 surface burning characteristics as required by project scope; in the EU/UK, reference EN 13501-1 flooring classifications (for example, Bfl-s1 where specified). Rely on current third-party test reports for the exact product you submit.
Stair geometry and visibility: Coordinate nosing projection, edge radius, and contrast visibility with local code requirements (e.g., IBC/ADA where applicable). Where required, specify contrasting inserts or edge strips to improve visibility.
IAQ: If the brief calls for it, request FloorScore/Greenguard certifications and VOC declarations for the selected SKUs.
Local authority coordination: Always confirm with the authority having jurisdiction and your building code consultant for final acceptance.
Integrated Stair System Options
A coherent stair package boosts speed and quality. Two core approaches are common:
- One-piece LVP tread with integrated nosing: Fastest install and the most consistent fit. Often paired with matching LVP risers. Typical overall thickness equivalent around 6–9 mm.
- Plank-wrap tread with separate nosing: Field-cut planks wrap the tread, with a matched flush or overlap nosing installed at the leading edge. Plank thickness typically 4.5–6.5 mm. More flexible on textures and budgets, but requires tighter cutting and sequencing.
Nosing profiles: Flush/square-edge profiles give a modern look and can reduce trip potential when treads are true and flat. Overlap/retrofit profiles are more forgiving on tolerances. For egress stairs, a defined, straight leading edge is generally preferred—confirm locally.
Transitions and landings: Specify reducers/T-molds at landings and corridor interfaces. Coordinate any required expansion provisions per manufacturer guidance.
| Option | What it is | Pros | Considerations |
|---|---|---|---|
| One-piece tread (integrated nosing) | Factory tread with built-in nosing + separate riser | Fastest installation; consistent edges; fewer seams | Less field flexibility; confirm exact width/depth tolerances |
| Plank-wrap + separate nosing | Field-wrapped planks on tread + matched nosing + riser | Flexible finishes; retrofit-friendly; cost control | More cuts; higher risk of seam/lip if substrate isn’t flat |
Installation Playbook for Scale (Glue-Down)
Substrate prep: Remove existing coverings and old adhesives to a sound, clean substrate (wood or concrete within manufacturer limits). Check flatness—aim for about 3/16 in over 10 ft; patch and skim as needed, and sand ridges. Test concrete moisture (for example, ASTM F2170 in-slab RH) and confirm the adhesive’s limits. Dry-fit a representative step to validate nosing projection and sightlines before production cutting.
Layout and cutting: Template each stair type once, then repeat. For repetitive flights, a stair gauge or digital template workflow speeds things up. Use sharp blades or fine-tooth saws; a slight back-bevel helps achieve tight seams. Label pieces by building, floor, flight, and step to prevent mix-ups and dye-lot mixing.
Adhesive and bonding: Choose a hard-set/firm-set, stair-rated adhesive approved by the LVP manufacturer. Follow trowel notch size and open time; don’t wet-set unless the system is designed for it. Key-in adhesive, maintain full coverage, and roll from the center out. Pay special attention to the nosing and leading edge for full contact. Clean squeeze-out immediately.
Sequence: If the riser sits behind the tread, install risers first. Place the tread, align at the back, and press the nosing firmly over the leading edge. For plank-wrap systems, install the separate nosing last, tight to the front edge, with a continuous bond across the width. Add visibility inserts or strips as required.
Finishing and curing: Install trims at stringers and landings. Protect with clean drop sheets and edge guards. Respect adhesive cure times before opening to traffic.
Field checks: Sight along the nosing line to confirm straightness, and tap to check for hollow spots. Where adhesive guidance allows, use a sacrificial offcut for a simple lift-test to validate bond strength in-situ.
Adhesives, Substrates, and Environmental Conditions
Adhesives: Favor hard-set products with high shear and plasticizer resistance that are specifically allowed for stairs by both the LVP and adhesive manufacturers.
Substrates: Use structurally sound wood (properly fastened) or concrete within moisture limits. Avoid flexible underlayments on stairs.
Conditions: Acclimate materials per manufacturer instructions and maintain temperature/RH within spec before, during, and after installation.
Quality Assurance and Punch List
- Dimensional: Consistent nosing projection and radius; uniform riser heights per code; seams tight with no lipping.
- Bond: No hollow areas; strong adhesion at corners and edges; no rebound at nosings.
- Appearance: No scratches; no visible dye-lot changes within a flight; consistent gloss and texture orientation.
- Records: Capture batch numbers, adhesive lot numbers, time/temperature/RH per flight for traceability.
Scaling Efficiently Across Multiple Buildings
Kitting and labeling: Kit per flight so crews receive everything for Steps 1–N together—treads, risers, nosings, trims, and inserts. Label by project > building > floor > flight > step. Include a printed cut map and a QR code to digital plans.
Dye-lot control: Reserve and lock dye lots per building. Hold spares labeled to the same lot to avoid visible variation.
Pre-shipment QC and packaging: Verify counts, profile compatibility, and color match under neutral light. Export packaging should include edge protection and ISPM 15-compliant pallets, with complete documentation (commercial invoice, packing list, certificate of origin, and current test reports). Build in customs clearance time for your market. Moisture indicators are helpful for ocean freight.
Site logistics: Stage pallets per core/stack. Align deliveries with crane/elevator windows to minimize double-handling and keep crews moving.
Note on supply partners: ChinaBestBuy supports kitted stair packages, documentation, and labeling workflows designed for multi-building rollouts.
Lead Times, MOQs, and Global Logistics (Typical Ranges)
Standard profiles/colors often ship in about 2–4 weeks ex-factory after approval; custom colors/textures or engineered nosings can run 4–8 weeks depending on tooling and sign-offs. Typical MOQs are in the range of 200–500 linear meters of nosing or 100–300 sets of treads/risers per color. Export packaging should include edge protection and ISPM 15-compliant pallets, with complete documentation (commercial invoice, packing list, certificate of origin, and current test reports). Build in customs clearance time for your market.
RFQ Checklist: What to Send to Receive an Itemized Stair Package Quote
- Project basics: project name, site country, Incoterms preference, required delivery window.
- Stair schedule: number of stairs by building/flight; typical tread width and run; riser height; count of landings.
- System choice: one-piece treads or plank-wrap + separate nosing; preferred nosing profile (flush/overlap) and any visibility insert requirements.
- Material specs: target thickness, wear layer, texture/emboss, slip/fire/IAQ requirements, and certifications to include in submittals.
- Finishes: colorway(s) and percentage split per building; whether a single dye lot per building is required.
- Accessories: risers, stringer trims, landing transitions, reducers, visibility strips; adhesives (note if supply is included or excluded).
- Drawings: plan/elevation, typical stair details, notes on nosing geometry and contrast.
- Packaging/logistics: kitting level (per step or per flight), labeling scheme, pallet height limits, offload constraints, and any consolidation with other materials.
- QA/documentation: request for test reports (ANSI A326.3 DCOF; ASTM E84/EN 13501-1), SDS, installation guides, and warranty terms.
Common Pitfalls to Avoid
- Floating LVP or foam underlayment on stairs, which leads to flexing and bond failure.
- Mixing dye lots within a single flight.
- Using overlap nosings over out-of-tolerance, uneven treads without substrate correction.
- Mis-specified trowel or open time, causing weak bonds—especially at the nosing.
- Skipping visibility contrast where required by code.
- Ignoring concrete moisture testing on stair pans or landings.
FAQ: Quick Answers for Project Teams
- Can we install over existing stair coverings? It’s not recommended. Remove to a sound substrate and correct geometry before installing the new system.
- Are flush nosings safer than overlaps? Both can comply if installed correctly. Flush profiles often reduce trip potential when treads are true and flat.
- Do we need expansion gaps on stairs? Follow the manufacturer’s guidance. Resilient stair systems rely on a full adhesive bond and perimeter trims—don’t introduce compressible underlays on steps.
- How should we approach open-riser or metal pan stairs? Coordinate build-ups and nosing attachment methods; metal pans may need patching/underlayment compounds and primers rated for metal.
Next Steps
If you’re specifying LVP across multiple buildings and want an apples-to-apples comparison, request an itemized quote for stair packages—treads, risers, and nosings—along with kitting, labeling, and logistics to your destination. Include the RFQ checklist above so you’ll receive a precise line-by-line proposal with lead times and compliance documentation.